Instructions and Planning
The first step is to always make sure all the parts are in the box. Once you check to ensure you have all the sprues, you must read the instructions. I know many of you will gloss over this part, but the fact remains knowing ahead of time, roughly how your model goes together, will make the assembly and sometimes painting process go smoother. If you review the model ahead of time you can begin to see the areas that will be difficult to reach with a brush. Sometimes it's best to assemble most of your model before painting and assemble the rest after. In the case of the pictured space marine, his chest is extremely difficult to reach. In this particular model's case I painted the arm assembly and bolter before gluing them to his torso.

There are also times when the instructions show you areas where you are not supposed to glue to allow articulation. Make mental notes of these areas so you don't accidentally glue these pieces together. This is true in the case of most armored models - they allow the turrets to turn and the barrels to elevate. Look at the M4A3 Sherman instructions pictured.

Many models come with parts that are accessories, or models that can be built more than 1 way. Look at these Tau instructions, they have multiple weapons and poses depending on the pieces you use to assemble the model. Always make a plan of how you want to equip your model before diving in. The one we are demonstrating today is very simple, to keep things uncomplicated while I guide you through the basics.

I’ll be taking you through most of the beginner’s guide using a Stormcast Eternal from Games Workshop's Warhammer Age of Sigmar.
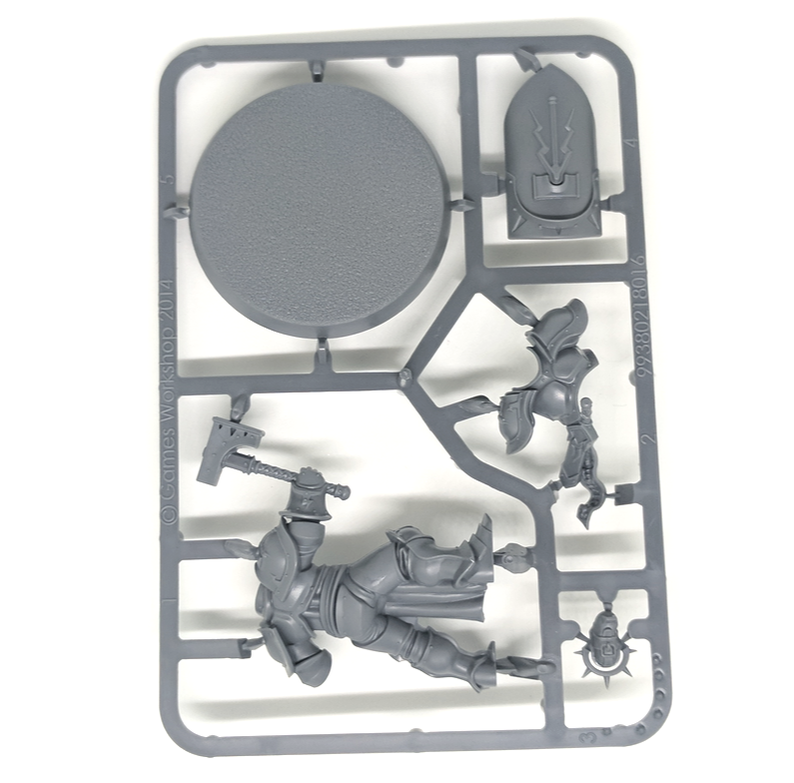
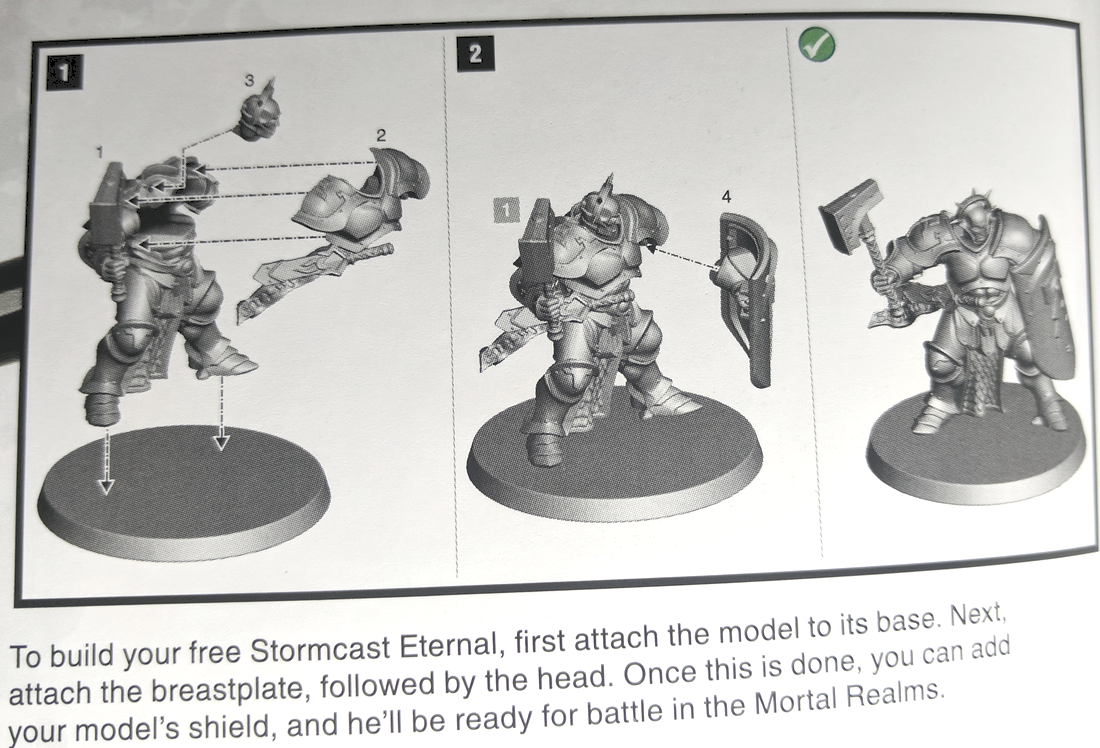
Introducing our Stormcast Eternal and his (rather simple) instructions.
Introducing our Stormcast Eternal and his (rather simple) instructions.
|
|
Now that we’ve made sure we have all the pieces, and the instructions are rather simple - no areas that need articulation, and no accessories to slap on him, we’ll head over to Step 2: Assembly.