There are many tools you can use for modeling your miniatures. Much like painting techniques, there aren’t really any right or wrong answers. I’ll show you the tools I consider essential. If your local hobby store sells any of these items (or equivalent) I highly encourage you to buy from them. Local Hobby shops provide a location for games, hobbying, and can be a wealth of advice. Supporting these local shops will only help your chosen hobby grow. That being said, if your local store doesn't offer what you're looking for, I've provided links to amazon. These are affiliate links; anytime you purchase items through these links you help me and keep the site going. TL;DR Essential Tools Summary!
|
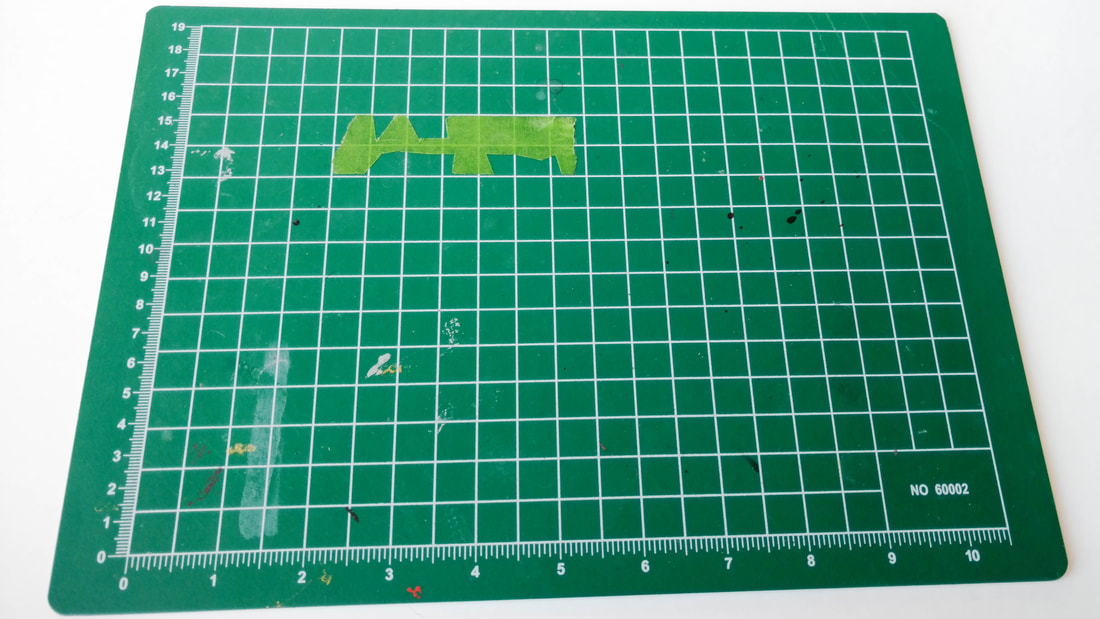
Hobby MatIf you want your desk or table to look like it receives weekly flagellation, from hobby knives scratching it up, dripping water, and paint everywhere, then feel free to disregard this recommendation. For the rest of us, I recommend a hobby mat, preferably one that is larger than 12” by 12” (30cm x 30cm).

|
|
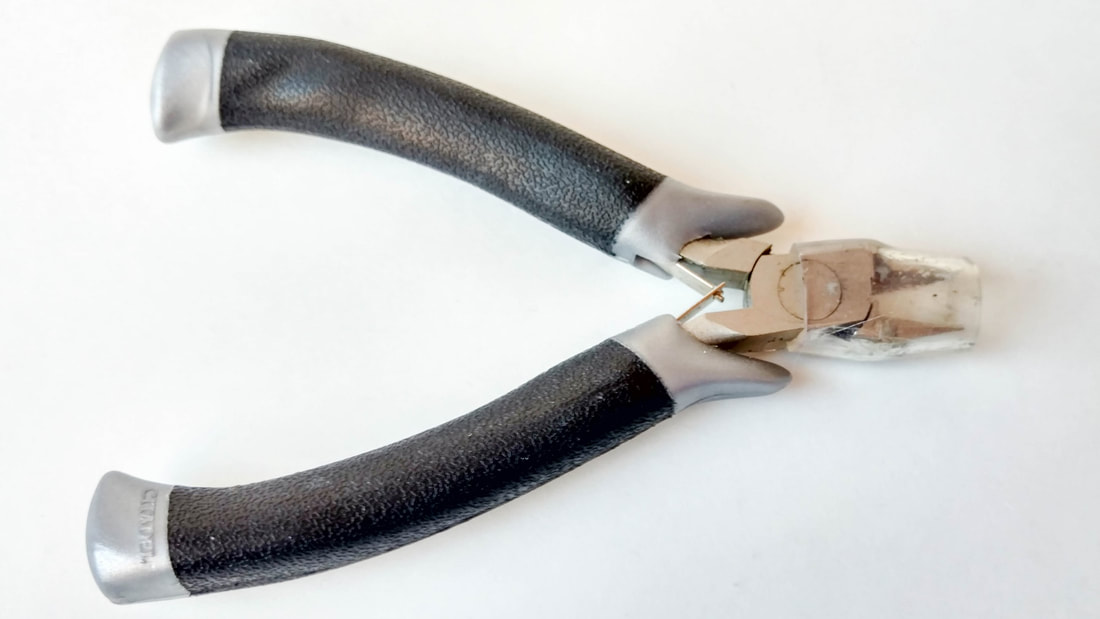
Snips (Cutters)This is what you use to get your pieces off of the sprues. You could potentially do this with a hobby knife, but you risk cutting yourself, the table, or damaging the model. For a couple bucks, a good set of clips can get your models out of their sprues in a jiffy and without damaging them. Please read the guide on how to cut out your models from their sprues to avoid damaging them.

|
|
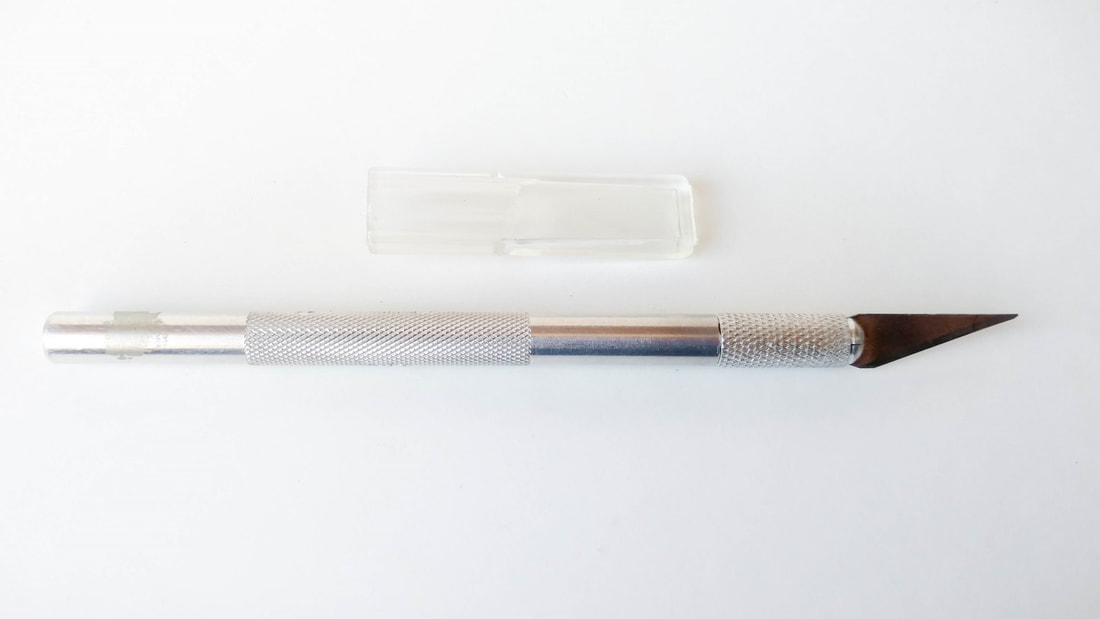
Hobby (X-acto) KnifeThis is probably the tool I use the most in preparing my models. This is great for cutting away excess plastic, the nubs from the sprue after cutting out the model, and it’s even perfect for smoothing out mold lines! Also great at cutting out tape to make camo, or cutting out transfers.Grab a decent knife and a few extra blades. Make sure to keep a cap on it, or keep the retractable part recessed when not in use. These are VERY sharp.

|
|
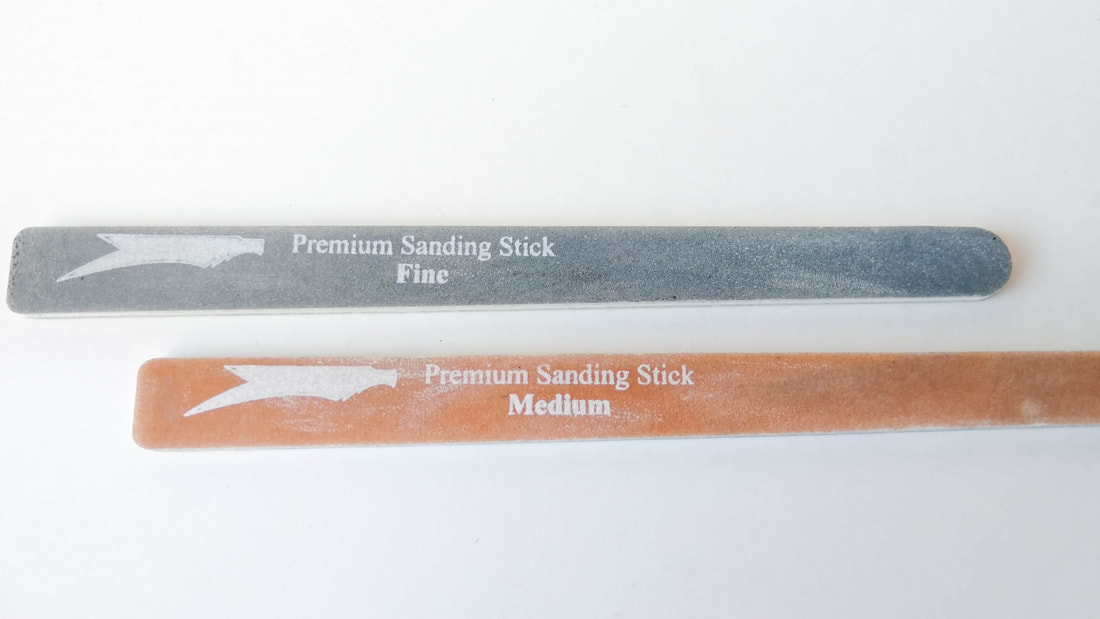
Files (Emery Boards)There are many files you can buy for removing mold lines. I found the technique I use to get rid of most of mine is with a hobby knife like the one above. Sometimes though, a good emery board is all you need. I prefer the ones like this because they can bend allowing you to squeeze them into tight spaces and around curved surfaces. I have a large set of metal files, that go mostly unused.

|
|
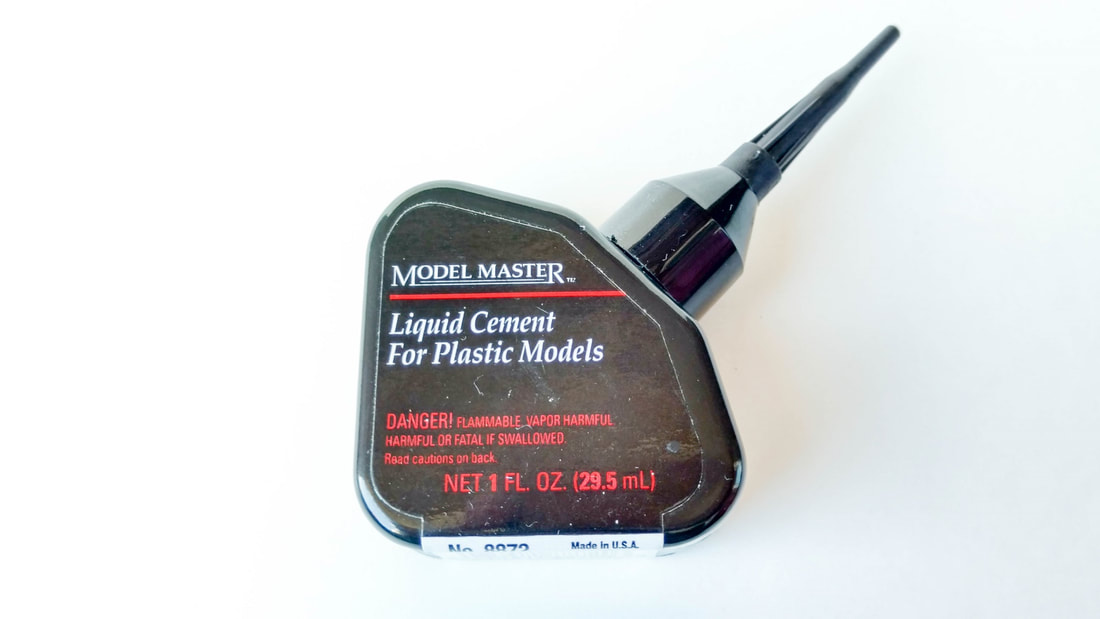
Plastic GlueWhen you apply this to a plastic surface, it actually melts the plastic. Put two pieces together and they will melt and then dry together like a weld. It’s perfect because it’s fast, but not ‘super glue’ fast. This will give you enough time to get your pieces in just the right spot, but doesnt take more than a few minutes to be mostly solid. Also it doesn’t stick your fingers together! If you are working with plastic models, there is absolutely nothing better than this. I recommend a fine tip applicator, like the one pictured. It really helps you control the quantity of glue.

|
|
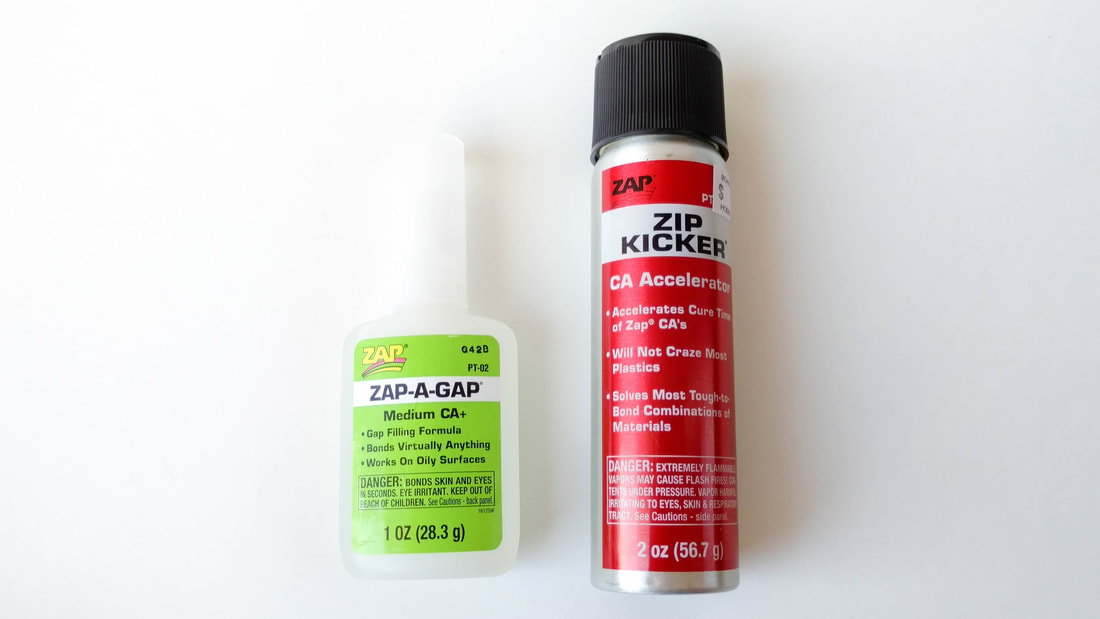
Super GlueThis is the stuff you use to assemble metal/pewter models, or resin models like the ones from Privateer Press. Resin models typically appear lighter in color than traditional plastic. If you aren’t sure, read the box and it should tell you their composition. If you put plastic glue on a resin model, you’ll know right away because it just won’t work. Don’t panic though, just wipe away the glue with a paper towel and grab your super glue. I’ve used many super glues, but so far my favorite has been ZAP-A-GAP with his special friend and life partner ZIP-KICKER. I go into detail on how to use these glues later in the guide. Note that you can use super glue on plastic models, but plastic glue is far superior.

|
|
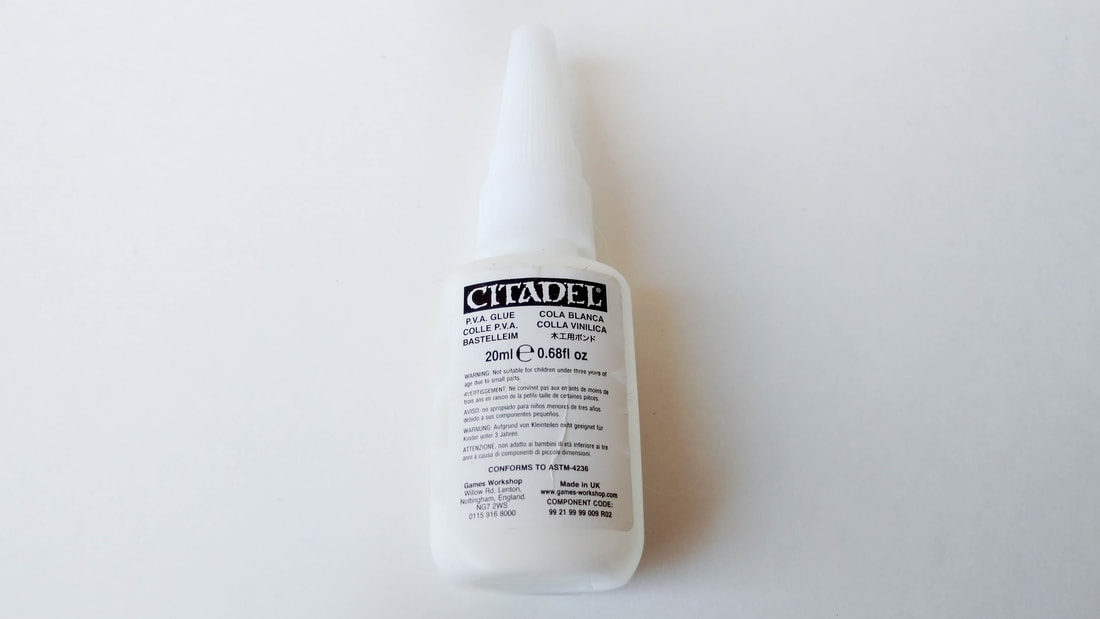
PVA (Elmer's) GlueYou probably remember this from elementary school. It goes one white, and dries mostly clear. If you’re going to use real sand or glue multiple materials together for unique bases, this is the glue you want. If you don’t end up buying texture paint, this is what you’ll want to use for basing your models with sand or grass tufts. You can check out the basing guide for more information.

|
|
PrimerYou’ll need a spray can of primer to make sure when you do start painting - the paint sticks to the miniature. You can get primer that you brush on, but this takes a very long time, and if you aren’t careful can clog up the details on your mini. For the money a spray can of primer can save you a lot of time. Especially if you can prime your miniature with it’s base coat color. That saves you two steps! I talk about which color of Primer to use in the guide here.

|
Paints
|
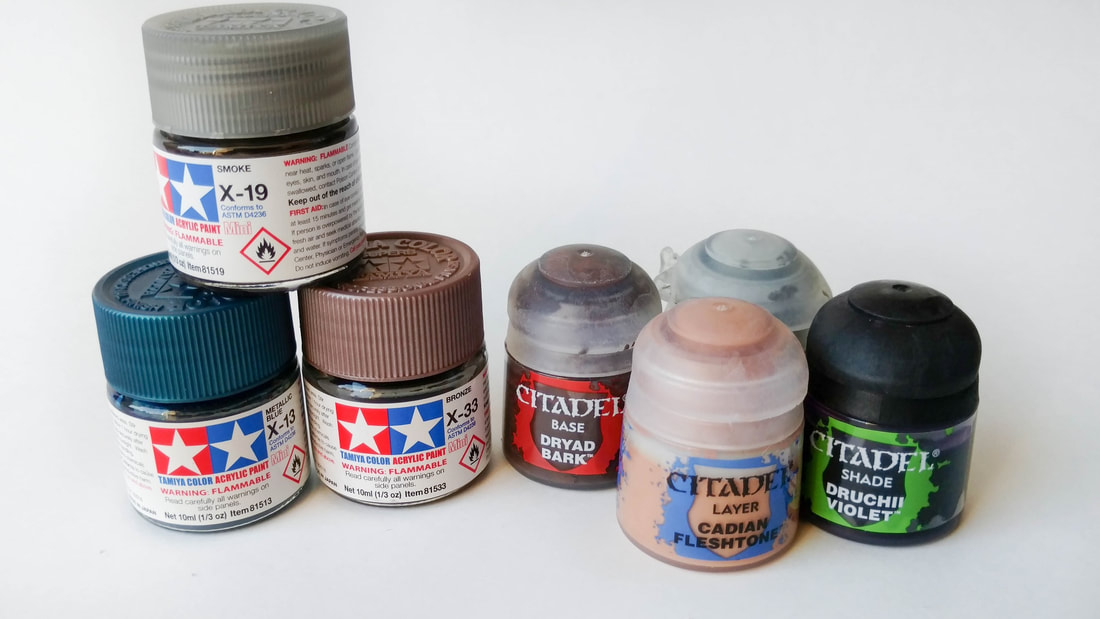
Acrylic paint is made of pigments that are suspended in an acrylic polymer emulsion. Basically a plastic like pigment that is suspended in fluids that do not mix (For that reason make sure you give your acrylic paint a good shake prior to use). My preferred paint is acrylic. It goes on thin to maintain detail, and it dries quickly usually in 5-10 minutes. You can also safely dilute it with warm water. Though my preferred brand is Citadel from games workshop, that’s because most of my models are also from them making it easy to follow their color guides. If you purchase citadel paint, keep in mind you are probably paying 2-3 times more for paint than if you use other paint systems like Vallejo, Reaper, Army Painter, or a classic like Testors (Enamel).
|
Other Paints
You can paint minis with other types of paint. Enamels are great for cars because they dry glossy and give a good solid nearly weatherproof finish. They are kind of like nail polish. They take quite some time to dry, typically have a smell to them (make sure to work in a ventilated area) and usually require special dilution as water won’t work. Enamels are generally a bit more expensive as well. Some people also use oil based paints. These are also more expensive, but can be really great for blending colors together. These paints also typically require their own thinners as well, and will take a long time to dry. For Wargaming minis, I’d recommend sticking to Acrylics, and then branching out as you become more confident in your skills.
Paint Brushes
These are the core brushes I recommend to get started. There are other brushes out there, and we’ll look at using some of them in our Technique Guide. I use mostly Tamiya brushes, because my local hobby store carries them, and they are a great intersection of quality and cost. I do have some Citadel brushes, which for the cost aren’t really worth buying. I’ve also got a few Army Painter brushes, but they were the same cost as the Tamiya brushes, and I much preferred the latter. You don’t need to stick with the same brands, but just make sure you buy a brush that generally fits the same size and scope.
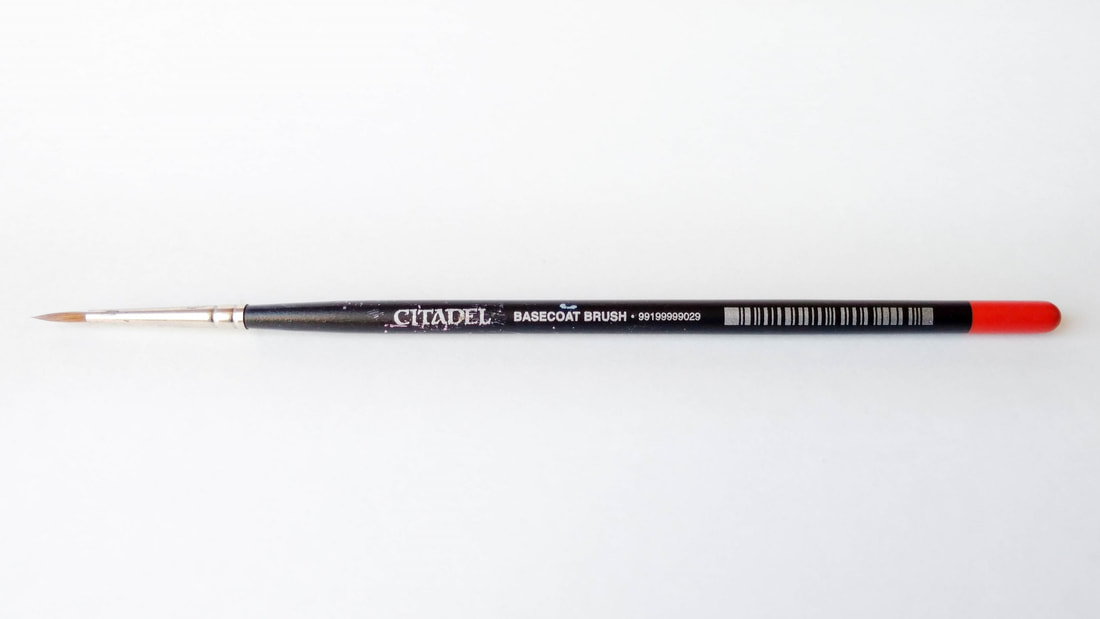
Base Coat BrushThis brush serves the purpose of getting your mini completely covered in a rather short amount of time. You could get away with just using a layer brush, but the time this will save is pretty great. I use a Citadel base coat brush, but really any brush around this size will likely suffice.
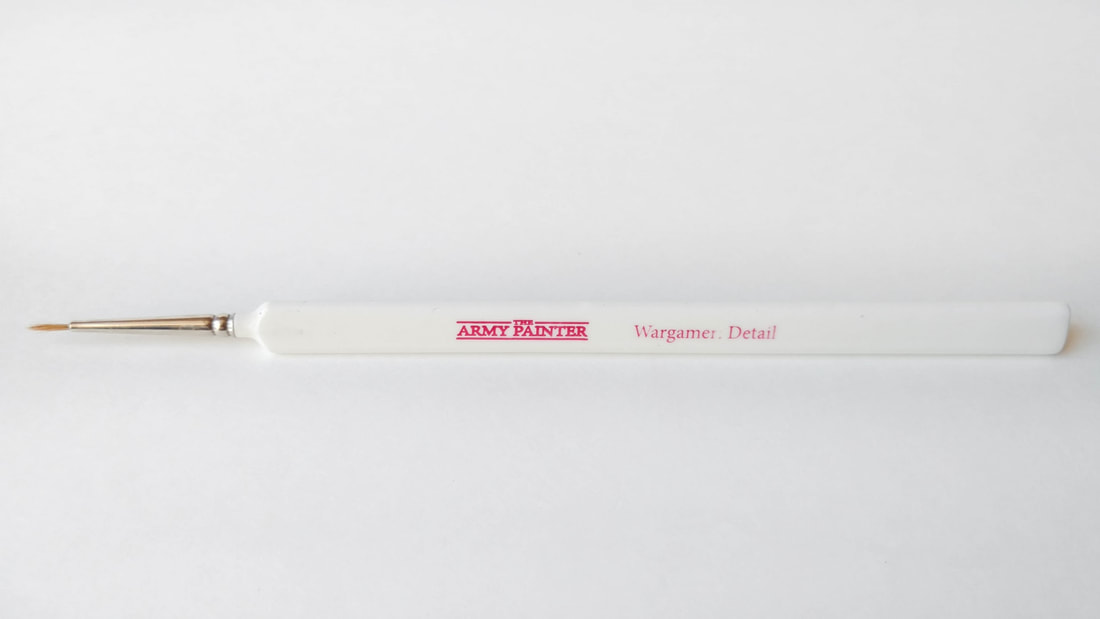
Fine Detail BrushThis is the brush you use for really small details. With it you can paint dots in eyes, inscriptions on parchment papers, or freehand symbols.I debated including this because you really don’t ‘need’ this brush, but when you find yourself requiring more control you’ll wish you had it.
|
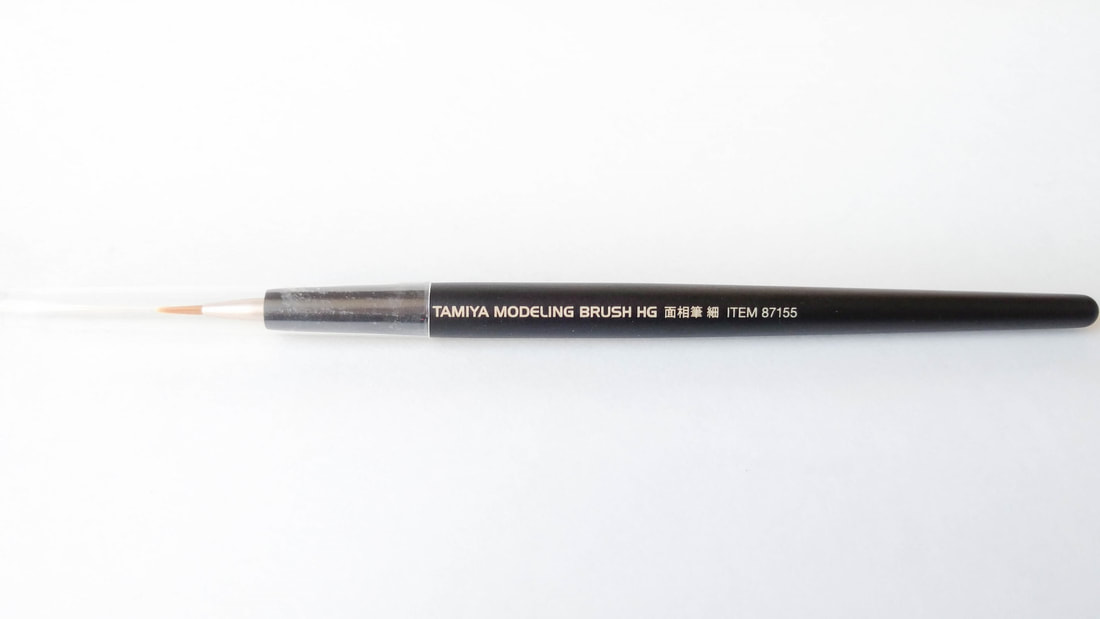
Layering/Detail BrushThis brush you will use to cover details, and you’ll likely use this brush for line highlighting, applying shades, and layering paints. This is your best all around brush. Pointed enough to get into small spaces, but large enough to carry the paint you need. I use at Tamiya brush (87155) for this.
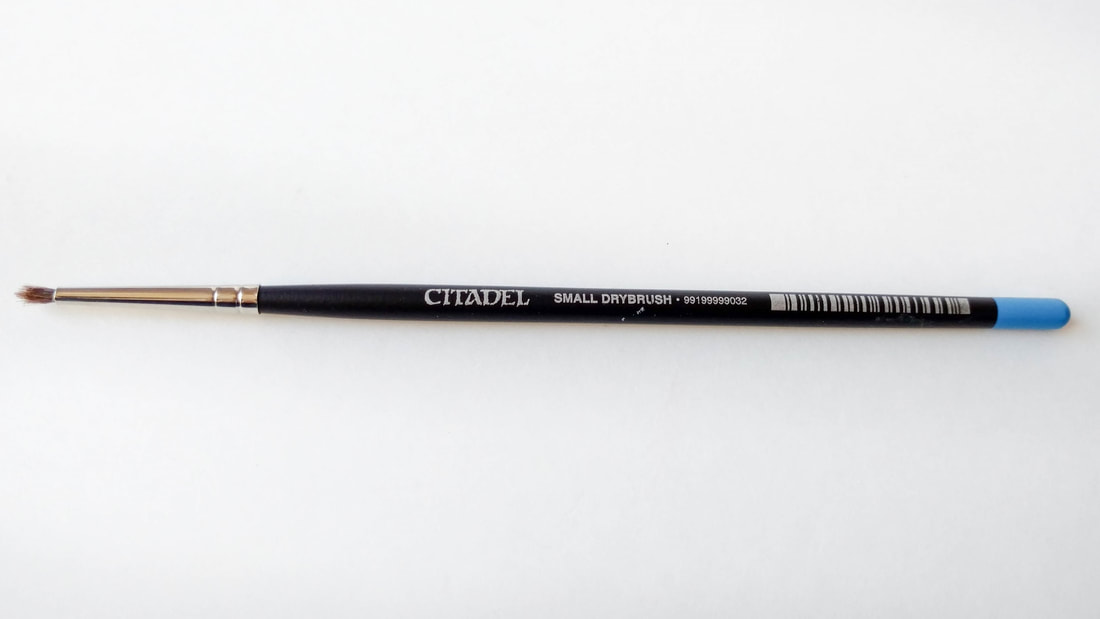
DrybrushUsing the dry brush in conjunction with a good shade is really the pinnacle of best looking results for least amount of work. This brush is different from the others in that it is generally not pointed, and the bristles are a little wild. I’ll guide you on how to use this brush for the dry brush later on.
|
|
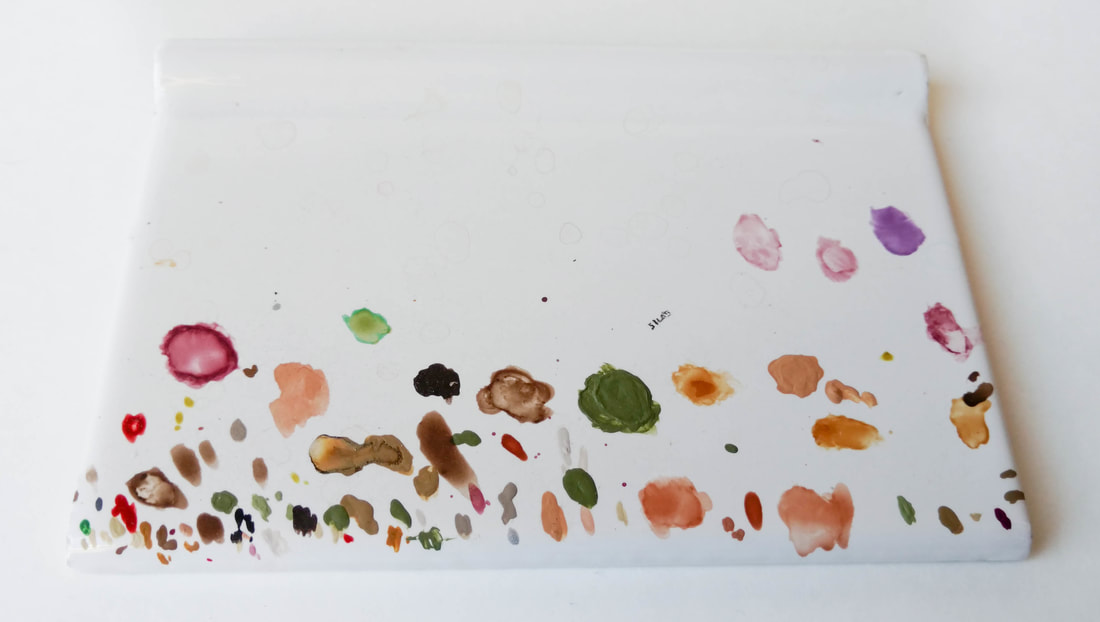
PaletteYou are going to want a palette to thin your paints on. You can find cheap plastic ones like this one here. I use an old piece of ceramic bathroom tile (pictured). I do also own this wet pallet. I go into more detail of the advantages of a wet pallet in the additional tools guide. If you are just starting out, find an old ceramic tile or get a cheap plastic palette and you’ll be good to go.
|
|
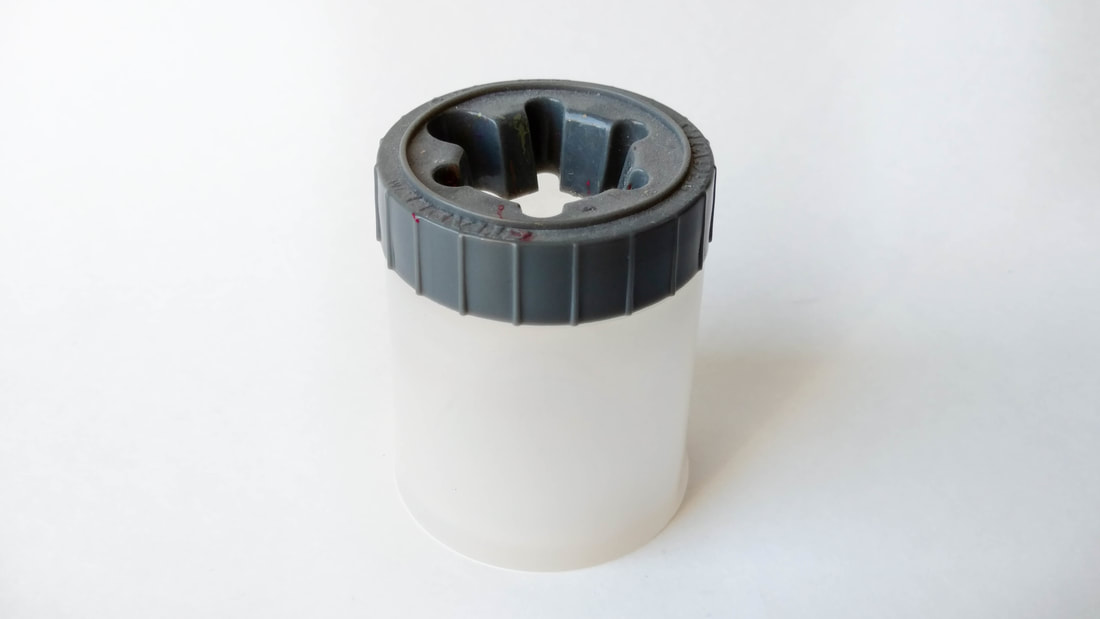
Water PotWhile painting you’ll be adding water to paints to thin them down, and you’ll use the water pot to clean your brush between colors. You can buy one like this but in an effort to save some cash you can use just about anything that holds water. I’ve even used ‘I Can’t Believe It’s Not Butter’ containers in the past. I’d recommend a clear one so you can see how dirty the water is getting and change it when it’s appropriate. Most maintenance mistakes occur with brushes and water pots, make sure you review the basic maintenance guide.
|
|
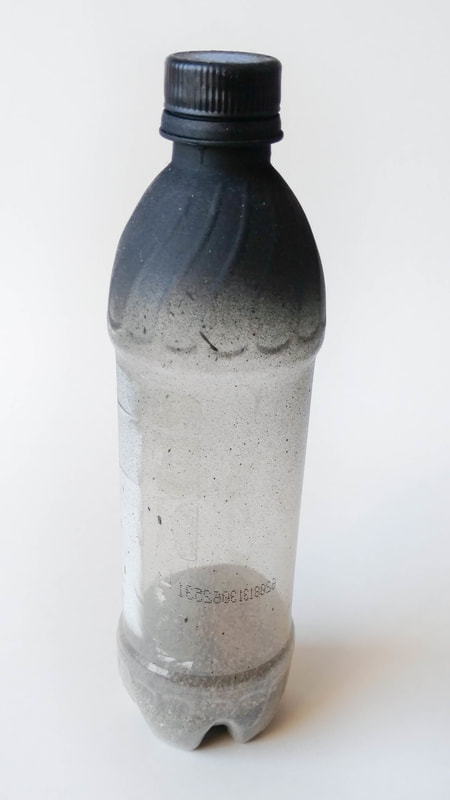
Priming Backstop/HolderWhen you go to prime your models you’ll need to prevent the over-spray from painting everywhere. Use an old cardboard box, the amazon box your stuff came in will work great! Use some poster putty to keep your models stuck to the cardboard - the breeze from a spray can will knock them over pretty easily. My personal favorite thing to do is get an extra tall soda bottle and use some putty to stick my model to cap. This is an incredibly slow process but it allows you to rotate the model all around and get clean coverage over the whole model without build up. Put some sand or water in the bottom and you can set it down without worrying about your model tipping over while it dries.
|
|
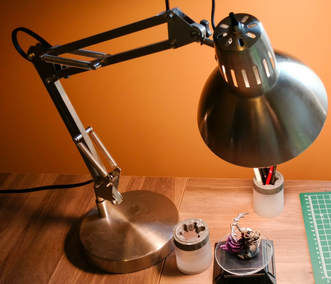
LightingI can’t recommend good lighting enough. A decent adjustable desk lamp will help you see the details on your models, and if it’s got good swivels and bends, you can set up your lamp at a certain angle to shine on your model and use the lamp itself to pick out points to highlight. Trying to paint a model in dim lighting will strain your eyes and contribute to mistakes. I use an off the shelf box store lamp with a good LED bulb. I went for a neutral color, but you could go whiter. I recommend LED to keep the heat off your mini, and so you don’t burn yourself when you swivel your light around.
|
Essential Tools Summary
- Hobby Mat
- Cutters (Snips)
- Hobby (X-acto) Knife
- Files (Emery Boards)
- Plastic Glue
- Super Glue Zap-A-Gap Accelerant Zip-Kicker
- PVA (Elmer's) Glue
- Spray Primer
- Paints (Citadel), Vallejo, Reaper, Army Painter, Testors (Enamel)
- Citadel Base Coat Brush, Layer Brush, Fine Detail Brush, Dry Brush
- Palette
- Cardboard Primer Backstop
- Adjustable Desk Lamp, LED Bulb